

TikTok has become a global powerhouse for short-form video marketing, revolutionizing how we consume and create content. But in 2025, the landscape is shifting the trends and platforms. Concerns over data privacy, algorithm fatigue, and regional bans have led users and creators to explore TikTok alternative platforms that offer similar experiences with added benefits. Whether you’re a content creator seeking better monetization platform and tools, a marketer looking for fresh engagement channels, or simply a user looking for a fun new app like TikTok, there are plenty of alternatives to choose from. In this blog, we’ll explore the top TikTok alternatives in 2025, comparing features, user experiences, and what makes each app stand out in today’s evolving short-form content ecosystem. What Makes a Good TikTok Alternative? Not every platform can match TikTok’s viral power—but many offer compelling features that make them worthy contenders in 2025. If you’re actively looking for a TikTok alternative or planning to diversify your content strategy, here are the key features to look for in an ideal short-form content platform: Short-Form Video Features At the core of any app like TikTok is the ability to create and consume short videos quickly. From vertical video formats and filters to intuitive editing tools and music integration—these are must-haves for any serious alternative to TikTok. Creator Monetization Tools One of TikTok’s biggest draws is its creator fund and brand partnerships. Best TikTok alternatives now offer tipping, ad revenue sharing, brand collaborations, and even NFT monetization, giving creators more ways to earn. Community Engagement Whether you’re growing a brand or building a fanbase, the strength of community features—like duets, comments, live streams, and reposts—can make or break a platform’s stickiness. Algorithm Transparency Creators are increasingly demanding fairness and clarity in how content is distributed. Platforms that provide insights into their algorithm or offer chronological feed options are gaining trust among users. Regional Availability Due to regional bans and policy shifts, access to TikTok may be limited in some countries. TikTok replacement apps with strong local presence or global rollouts provide more reliable access for creators and audiences alike. Data Privacy & Ownership With privacy concerns on the rise, platforms that emphasize data ownership, user security, and ethical data use are becoming more attractive, especially in regions with stricter digital laws. List of Top 7 TikTok Alternatives to Try in 2025 Each platform below is tailored for different types of creators and users, giving you a wide range of apps like TikTok to explore based on your goals and audience. #1 Instagram Reels Integrated directly into Instagram’s massive ecosystem, Instagram Reels offers a seamless short-form video experience. With tools for editing, music syncing, effects, and more, Reels helps creators reach a broad global audience without needing to switch platforms. Key Features of Instagram Reels: Ideal For: Influencers, lifestyle content creators, and brands looking to repurpose TikTok-style videos for a more mature and engaged user base. Why it’s a strong TikTok alternative: If you’re already on Instagram, Reels lets you tap into a huge audience with short-form content—no additional apps required. #2 YouTube Shorts Backed by the world’s biggest video platform, YouTube Shorts gives creators a familiar but powerful space to share short clips with high visibility. Key Features of Youtube Short: Ideal For: Video creators who already have or want to grow a YouTube presence with snackable, short-form content. Why it’s a top TikTok alternative app: YouTube Shorts combines monetization and discoverability, making it ideal for creators seeking a TikTok replacement that also supports long-term content growth. #3 Triller Often considered a more music-centric alternative to TikTok, Triller focuses on high-quality music videos, performances, and collaborations, making it a favorite among artists and influencers. Key Features of Triller: Ideal For: Musicians, performers, and users who value creative control and visibility in the U.S. market. Why it’s a strong alternative: If you’re looking for a TikTok alternative app with serious music backing and fewer data privacy concerns, Triller is a solid choice. #4 Clash (formerly Byte) Clash is built by creators, for creators. It’s less about going viral and more about authentic, community-driven engagement. The app promotes direct fan support with in-app tipping. Key Features of Clash (formerly Byte): Ideal For: Independent creators and niche influencers who want to build meaningful connections and get paid directly by fans. Why Clash stands out: As a site like TikTok but with less algorithm manipulation, Clash empowers creators with transparency and creator-first tools. #5 Zigazoo A highly engaging and kid-safe TikTok alternative, Zigazoo blends short videos with a gamified learning experience. Key Features Zigazoo: Ideal For: Parents, educators, and brands targeting Gen Alpha and younger Gen Z audiences. Why it matters: If you’re searching for a safe short-form content platform for younger users, Zigazoo is one of the best apps like TikTok for kids. #6 Snapchat Spotlight Snapchat isn’t new—but Spotlight is its answer to TikTok. It rewards creators with cash incentives for viral clips, making it a serious contender in 2025. Key Features of Snapchat Spotlight: Ideal For: Existing Snapchat users and creators targeting younger, Western audiences. Why it’s a strong alternative to TikTok: Snapchat’s unique ephemeral vibe plus monetization makes Spotlight a fun, profitable option for creators. #7 Lomotif Often dubbed “the TikTok of Asia,” Lomotif offers an intuitive platform for music-led short videos, popular in regions like India, Singapore, and Brazil. Key Features Lomotif: Ideal For: Creators outside the U.S. seeking apps similar to TikTok with a global reach and music-friendly interface. Why it stands out: With increasing restrictions on TikTok in some regions, Lomotif fills the gap as a reliable TikTok replacement app. How to Choose the Right TikTok Alternative With so many apps like TikTok available in 2025, choosing the right one depends on your goals—whether you’re a content creator, marketer, or casual user. Here’s how to pick the platform that aligns with your strategy: Define Your Purpose Ask yourself: For creators looking to earn, platforms like YouTube Shorts, Clash, or Snapchat Spotlight offer better monetization options than TikTok.

450+ Cool and Cute Instagram Girls names To increase Instagram followers
Your Instagram username is more than just a handle; it’s your digital identity. In 2025, with over 2.5 billion monthly active users Instagram continues to be a powerhouse for personal branding, content creation, and community engagement. Whether you’re an influencer, entrepreneur, or casual user, having a unique and memorable username can set you apart in a crowded digital space. Trends have evolved—users are now opting for authentic and relatable usernames that reflect their personality, interests, or niche. A cool, catchy Instagram name for girls can make a profile more searchable, recognizable, and engaging, ultimately attracting more followers and interactions. In this blog, we’ve compiled 450+ cool, cute, and stylish Instagram usernames for girls and female, categorized to help you find the perfect match. Whether you’re looking for a trendy, aesthetic, or fun username, we’ve got you covered! List Of Top cool and cute Instagram names for girls It has become a trend to use cool usernames for Instagram for users and everyone prefers using the best username for Instagram. A name that is perfect shows your personality and conveys what your account is for to attract more followers. If you keep your name in hurry it tends to show you low on attending your IG profile. However, if you use a cool username for Instagram it makes your profile attractive. You can even go online and find name generating tools. What is the importance of Instagram username for girls and why should it be considered? There are many reasons to keep in mind while changing a cool username for Instagram. Here we will show you Instagram username ideas for girls and why it is necessary to do so. To express your identity and personality the cute girly Instagram username is your empathy badge. More followers get attracted by classy and unique female usernames on social media platforms like Instagram If there is a smart and right name for the Instagram page then it would help to automatically target the right follower’s profile A username can also represent you as a brand as the username can use into multiple social media platforms such as Facebook, TikTok, YouTube, Twitter and Snapchat Your true character is showcased if you stay timeless, relevant and cool no matter how much longer you have been on Instagram Instagram girl’s username shouldn’t be complicated so it allows you to locate easily on account search and identify better content. An easily remembered username increase your engagement and enhance social media platform traffic on your account 400+ cool and cute Best Instagram username for girls (Updated 2025) If you are looking for the best Instagram username ideas for girls then in this article, an extensive 400+ Instagram username for girls would be showcased that would be worth your Instagram profile. Tips for Choosing the Perfect Instagram Username Your Instagram username plays a crucial role in shaping your online identity. It’s the first thing people notice, so choosing the right one can help you stand out, be memorable, and attract the right audience. Here are some actionable tips to help you craft the perfect Instagram username: Reflect Your Personality & Interests Your Instagram username should be a reflection of who you are and what you love. Whether you’re into fashion, travel, fitness, art, or K-pop, pick a name that resonates with your passion or personal brand. Example: If you’re a fashion lover, consider @TrendyBelle or @VogueVixen. If you’re into fitness, try @FitFierceXO or @ActiveAva. Keep It Simple & Easy to Remember A short and catchy username is easier to remember and search for. Avoid using long, complicated words or too many underscores that make it difficult to type. Example: Instead of @Xx_Queen_Beauty_999_xX, go for @BeautyQueenXO. Avoid Numbers & Special Characters (Unless Necessary) Using random numbers or too many special characters can make a username look messy and unprofessional. However, if your preferred username is taken, try adding a relevant word or abbreviation instead of numbers. Example: Instead of @Emma12345, try @EmmaGlow or @EmmaVibes. Check Username Availability Before finalizing your Instagram name, search for it on Instagram to ensure it’s available. If the username is already taken, try modifying it slightly by adding: Make It Unique & Brandable A unique username makes you stand out and helps build a recognizable brand. Try mixing two words, using creative spellings, or adding playful elements. Example: Instead of @CuteGirl22, try @CutieClouds or @DimpleDiva. Consider Future Growth If you’re planning to grow your Instagram profile, pick a username that is versatile and scalable. Avoid using trendy slang that might become outdated. Example: Instead of @SnapQueen2022, use @SocialQueenXO for long-term branding. Avoid Copyright & Trademarked Names Make sure your username doesn’t violate copyrights or mimic existing brand names. Instagram may remove your profile if your name infringes on trademarks. Example: Instead of @CocaColaFan, use @ColaVibes or @SodaLoverXO. Think About SEO & Visibility If you’re a content creator, influencer, or business, having keywords in your username can make your profile more search-friendly. Example: A food blogger can use @TastyBitesByTina, and a makeup artist can use @GlamByGrace. How to change an Instagram username or Name step by step? As you want to use Instagram publicly for your business or promotion of your own self; a username should be chosen wisely. It should be shorter, simple and the best Instagram username for girls to be remembered by people. Follow these steps to change the cute instagram usernames for girls: 1. On your mobile phone, open the Instagram App.2. Go to your profile3. Now, click on to edit profile4. From the list given above choose the best Instagram username for girls.5. Remove your older name6. Enter the cool username for Instagram7. On the top right side, click to save the changes Conclusion Find the Perfect Instagram Username & Make It Yours! Choosing the right Instagram username is more than just picking a name—it’s about creating a digital identity that reflects your personality, interests, and brand. Whether you want something trendy, cute, aesthetic, funny, or bold, the perfect username helps
How to Go Viral on Instagram in 2025: Proven Tips & Strategies
Instagram isn’t just a platform for sharing photos—it’s a powerhouse for building personal brands, promoting businesses, and creating viral moments. But with over 2 billion active users, standing out on Instagram requires more than just a great post. It’s about mastering the art of engagement and understanding what makes content go viral. So, what is viral on Instagram? A post, Reel, or Story becomes viral when it gains rapid traction—likes, comments, shares, and saves—beyond your regular audience. Virality isn’t just luck; it’s the result of strategic planning, creative content, and leveraging Instagram’s algorithm to your advantage. In this guide, we’ll explore proven strategies to help you go viral on Instagram, from understanding your audience to creating emotionally compelling content. Whether you’re a business, influencer, or simply looking to grow your presence, these steps will set you on the path to going viral on Instagram. What Does It Mean to Go Viral on Instagram? Going viral on Instagram means your content reaches a vast audience, far beyond your usual followers, in a relatively short amount of time. It’s the moment when your post, Reel, or Story generates exceptional engagement—likes, comments, shares, and saves—leading to massive visibility and exponential growth. Key Characteristics of Viral Content on Instagram The Role of Instagram’s Algorithm Instagram’s algorithm determines which content gets pushed to more users. To go viral on Instagram, your content needs to signal strong engagement metrics. The algorithm prioritizes: Proven Strategies to Go Viral on Instagram Achieving virality on Instagram isn’t just about luck; it’s about implementing proven strategies that consistently deliver results. Whether you’re a creator, influencer, or business owner, these steps will help you craft content that resonates deeply with your audience and maximizes your chances of going viral on Instagram. Understand Your Target Audience Knowing your audience is the cornerstone of any successful Instagram strategy. Without a clear understanding of who you’re trying to reach, your content may fail to connect. Start by diving into Instagram Insights, which provides valuable data about your followers, including their age, gender, location, and activity times. Pro Tip: If your audience skews younger, tap into trends like memes, Reels with trending audio, or behind-the-scenes content for relatability. Define Your Brand Voice and Personality Your brand voice is what makes your content stand out in the sea of posts on Instagram. It’s the personality behind your account and sets the tone for how you communicate with your audience. A strong and consistent voice builds trust and recognition over time. Bonus Tip: Stick to a consistent aesthetic—colors, filters, and layouts—so your audience can instantly recognize your posts. Know Your Competition Analyzing your competitors is not about imitation but about learning what works and how you can improve upon it. Study their content to identify successful strategies you can adapt for your own account. Pro Tip: Identify what your competitors are missing. For instance, if they’re not using Reels effectively, capitalize on that opportunity to gain an edge. Create Unique and Shareable Content On a platform like Instagram, where millions of posts are uploaded daily, creating unique content is essential to go viral on Instagram. Focus on originality by bringing a fresh perspective or added value to your posts. Stat: Carousel posts generate up to 1.4x more reach and 3.1x more engagement than single-image posts. (Source: Hootsuite) Pro Tip: Include a strong call-to-action (CTA) in your posts, such as “Tag a friend who needs this!” or “Save this for later.” Make Your Content Emotionally Appealing Emotionally engaging content tends to perform exceptionally well on Instagram because it forms a connection with the audience. Bonus Tip: Monitor which emotional themes resonate most with your audience and double down on them for future posts. Leverage Trending Content and Hashtags Trends are an opportunity to ride a wave of heightened visibility, but they require quick action and creativity. Pro Tip: Add trending audio to Reels or create content that puts a unique spin on popular challenges to stand out. Go Viral with Reels Instagram Reels are the platform’s powerhouse for driving discoverability. The algorithm heavily favors Reels, especially those that use trending audio and encourage interaction. Stat: Videos (including Reels) get 49% higher engagement than static posts on Instagram. (Source: HubSpot) Pro Tip: Reply to audience questions or comments using Reels to build stronger connections while boosting visibility. Know Your Performance Results to Date Understanding what has worked for you in the past is crucial to optimizing future content. Analyzing your performance helps you pinpoint the types of posts, formats, and themes that resonate most with your audience. Start by using Instagram Insights, which provides data on reach, impressions, engagement, and more. Identify which posts have the highest saves, shares, or comments, as these are key indicators of content that has viral potential. For instance, if your carousels consistently receive high engagement, consider creating more educational or step-by-step posts in this format. Another effective approach is to monitor engagement spikes. Did a particular post or Reel perform better after being shared widely? Did your audience interact more with posts that featured a trending topic? Answering these questions allows you to refine your strategy for greater impact. Bonus Tip: Use tools like Later or Iconosquare for advanced analytics and insights, which can help you track trends over time and plan more effectively. Collaborate with Influencers and Brands Influencer collaborations are one of the fastest ways to expose your content to a broader audience. Whether you’re working with a micro-influencer or a well-known brand, partnerships can amplify your visibility and engagement. When choosing influencers, focus on those whose values align with your brand. Authenticity matters—followers are quick to spot partnerships that feel forced or disconnected. For example, a fitness brand might collaborate with a personal trainer who shares workout tips. To get started, research influencers in your niche using platforms like Heepsy or Upfluence. Approach them with a clear value proposition, such as a co-branded giveaway, exclusive content, or mutual cross-promotion. Pro Tip: Micro-influencers (10,000–50,000 followers) often have higher engagement rates
Instagram Image Size Guide for 2025: Dimensions &Ratios
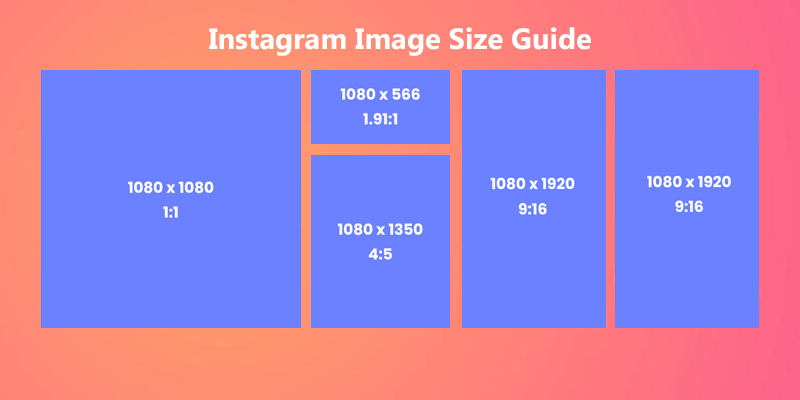
Ever uploaded an Instagram post only to find it cropped awkwardly or looking blurry? In today’s digital world, visuals are everything. With Instagram’s monthly active user base surpassing 2.35 billion in 2025, ensuring your content looks flawless is no longer optional—it’s essential for engagement, branding, and standing out in the crowd. Take, for instance, a small online clothing brand that optimized its Instagram posts to the recommended dimensions. Within a month, their post-engagement rate increased by 35%, thanks to improved visual appeal and clarity. In this guide, we’ll break down all the recommended Instagram image sizes, from posts and stories to ads and reels, and provide actionable tips to ensure every upload is pixel-perfect. Why Understanding Instagram Image Size is Important? In a platform dominated by visuals, the way your content appears can make or break your engagement. Every detail, from clarity to framing, plays a role in how your audience perceives your brand. That’s why understanding and using the correct Instagram image sizes is more than just a technicality—it’s a necessity. When images are uploaded in the wrong dimensions, several issues can arise: On the flip side, using optimized image sizes ensures: Whether you’re a content creator, small business owner, or a brand marketer, mastering Instagram image sizes can help you achieve more with less effort. Read About How to see who shared your Instagram Post on Story Instagram Image Sizes: The Complete Guide Instagram has specific size requirements for every type of post, from profile pictures to stories and reels. Using the correct Instagram image size ensures your content looks professional, avoids unnecessary cropping, and keeps your audience engaged. Below is a comprehensive breakdown of the recommended dimensions for 2025: 1. Profile Picture 2. Feed Posts Feed posts are the heart of Instagram. The platform allows three main formats, and each has its own size and aspect ratio. Here’s a quick reference guide: Post Type Dimensions Aspect Ratio Best Use Case Square 1080 x 1080 pixels 1:1 Balanced compositions, minimal text. Landscape 1080 x 566 pixels 1.91:1 Wide-angle shots, scenic views. Portrait 1080 x 1350 pixels 4:5 Maximizing screen real estate. Pro Tip: Wondering what dimensions are Instagram posts? Stick to a width of 1080 pixels for all feed formats and adjust the height according to the aspect ratio. Read More About How to See Most Recent Followers on Instagram 3. Carousel Posts 4. Instagram Stories 5. Instagram Reels 6. IGTV Videos and Thumbnails Pro Tip: When creating IGTV thumbnails, ensure the key elements are centered and clear, as this is what viewers see first before clicking on your video. 7. Instagram Ads Ad Type Dimensions Aspect Ratio Purpose Square Ads 1080 x 1080 pixels 1:1 Balanced visuals, and concise messaging. Vertical Ads 1080 x 1350 pixels 4:5 Full-screen, high-impact engagement. Landscape Ads 1080 x 566 pixels 1.91:1 Wide, cinematic feel. Optimized Instagram image sizes for ads ensure your brand message isn’t compromised and grabs attention quickly. Tools for Creating Perfect Instagram Posts Creating Instagram posts with the right dimensions doesn’t have to be a hassle. With the right tools, you can resize, edit, and enhance your images to fit the ideal Instagram post size every time. Here are some of the best tools to help you create pixel-perfect posts: How These Tools Simplify Your Workflow Common Mistakes to Avoid Instagram Posts Size Even with the best intentions, many creators and businesses make mistakes that impact the quality and effectiveness of their Instagram posts. Here are the most common pitfalls and how to avoid them: 1. Using Low-Resolution Images 2. Ignoring the Recommended Aspect Ratios 3. Overlooking Instagram’s Compression Rules 4. Not Considering Safe Zones 5. Failing to Maintain Consistency Across Posts Pro Tip: Preview your content in Instagram’s draft mode before posting to catch any sizing or cropping errors. Know About How to Hire Instagram Manager Pro Tips for Optimizing Instagram Image Sizes Making your Instagram posts stand out isn’t just about choosing the right photo; it’s also about nailing the technical details. A few small tweaks can make a big difference in how your content is perceived. Here are some easy, actionable tips to get it right every time. Start with high-resolution images. Ever noticed how some posts look grainy or pixelated? That’s often because the image resolution is too low. For Instagram, the magic number is 1080 pixels wide—anything smaller might lose clarity, especially when Instagram compresses it. Aspect ratios are your best friend. Instagram has very specific formats for its posts, and sticking to them is non-negotiable if you want to avoid awkward cropping. Use these simple rules of thumb: Think of these ratios as the secret sauce to a polished, professional feed. Compression can be a sneaky culprit. Even if your photo looks perfect on your phone, Instagram’s compression might dull the quality. To fix this, compress the image yourself using tools like TinyPNG or Photoshop. This gives you control and keeps your files under 30MB, which is ideal for quick uploads. Don’t forget the “safe zone.” You’ve probably seen Instagram stories or reels where text gets cut off or hidden behind Instagram’s buttons. It’s frustrating, right? To avoid that, keep all your key elements—like text or logos—within the middle 80% of the screen. This trick works wonders for stories and reels! And here’s a little hack: always preview your posts in Instagram’s draft mode. This lets you catch any mistakes with cropping or alignment before your audience sees them. It’s a quick extra step that can save you from posting blunders. Interactive Features and Resources Creating Instagram posts that stand out can feel overwhelming, but having access to the right resources makes it easier. To help you optimize your workflow, here are a few interactive tools and resources you can use: 1. Image Size Calculator Ever wondered if your image is the right size for Instagram? Online image size calculators can help. These tools let you input your dimensions and provide instant feedback on whether your post will meet Instagram’s requirements.
How to See Most Recent Followers on Instagram: Easy Guide
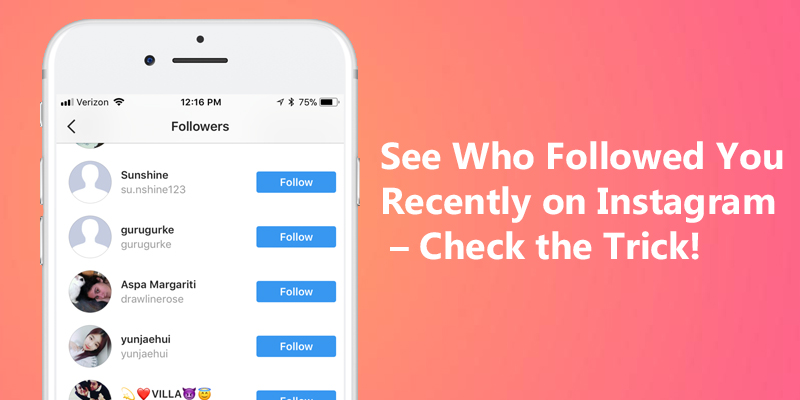
Imagine this: You’re a small business owner who just launched a limited-time offer on Instagram. Your notifications are flooding with new followers, but you’re not sure if they’re your target customers or bots. Or perhaps you’re an influencer who just posted a viral reel and wants to identify the people engaging with your content. Knowing your most recent followers can provide you with real-time insights into your audience’s behavior and help you make smarter decisions. Now consider this: A competitor’s follower count is surging, and you’re curious about the accounts they’re attracting. Can you check their most recent followers ethically and effectively? Many users face similar situations, and that’s why understanding how to track followers on Instagram is a must for both personal and professional purposes. This guide will equip you with simple methods to view your own and others’ recent followers on Instagram. From using the platform’s native features to exploring secure third-party tools, we’ll walk you through every step. You’ll also learn how to troubleshoot common issues and protect your privacy while navigating these features. Whether you’re managing your personal account or a growing brand, this blog has everything you need to stay ahead in the Instagram game. How Monitoring Recent Instagram Followers Can Help? Tracking your recent Instagram followers is more than just a habit—it’s a strategy that offers valuable insights, whether you’re a personal user or managing a business account. Here’s why it’s important: 1. Strengthening Personal Connections For personal users, staying updated on recent Instagram followers can help build stronger relationships. For example, when an old friend follows you, a timely engagement with their content can rekindle connections. 2. Understanding Audience Behavior for Businesses Businesses can learn a lot by monitoring recent Instagram followers. Imagine launching a new product and noticing followers from a specific region. This insight can help you refine your marketing strategy to target that location effectively. 3. Spotting Bots and Fake Followers Regularly reviewing your followers helps detect suspicious accounts. Removing bots ensures your profile remains authentic and trustworthy. 4. Gaining Competitive Insights By observing who follows your competitors, you can discover new audience trends. For instance, if a competitor gains followers from a niche you hadn’t considered, it might inspire you to adapt your content or campaigns. Keeping track of how to see most recent followers on Instagram can provide real-time insights to enhance engagement, refine strategies, and stay ahead of the competition. Get Insights on Why Are My Instagram Stories Blurry? How to See Most Recent Followers on Instagram Tracking your most recent followers on Instagram is straightforward when you know the right methods. Below are the step-by-step instructions for using Instagram’s native features and third-party tools effectively. 1. Using the Instagram App (Mobile Users) The Instagram app lists your followers in reverse chronological order, with the most recent ones appearing at the top. Follow these steps: 2. Using Instagram Web (Desktop Users) If you prefer using a desktop, you can also view recent Instagram followers via the web: 3. Using Third-Party Tools Third-party tools can provide additional insights into your followers: Note: Always ensure the tools you use are secure and do not require sensitive login information. Know How to Hire an Instagram Manager? How to See Someone’s Recent Followers on Instagram Curious about how to see someone’s recent followers on Instagram? While Instagram doesn’t officially provide a direct method for this, there are a few ethical and effective ways to gain insights: 1. Checking Public Profiles If the account you’re interested in is public, you can view their followers by following these steps: 2. Using Secure Third-Party Tools Some tools claim to offer insights into someone’s followers. While not all tools are trustworthy, reputable ones like Social Blade can provide follower growth trends without breaching privacy. Important: Avoid tools that ask for your Instagram login credentials. 3. Respecting Privacy Before trying to access someone’s recent Instagram followers, consider the ethical implications. Respect for privacy fosters trust and avoids potential violations of Instagram’s guidelines. By following these steps, you can explore how to see someone’s recent followers on Instagram responsibly and effectively. Troubleshooting: Why Can’t You See Your Most Recent Followers on Instagram? At times, you might face issues when trying to view your most recent followers on Instagram. Don’t worry—these problems are usually easy to resolve. Here are common reasons and their fixes: 1. App Glitches or Bugs Instagram’s app may occasionally experience glitches, preventing the followers list from updating.Fix: 2. Poor Internet Connection A weak or unstable internet connection can stop the followers list from loading properly.Fix: 3. Account-Specific Issues If your account is flagged or restricted, Instagram features like follower updates may not work as expected.Fix: 4. Outdated Cache Cached data can sometimes cause the app to display an outdated followers list.Fix: By addressing these common issues, you’ll be able to access your recent Instagram followers seamlessly. Read About How to see who shared your Instagram Post on Story? Privacy and Security Concerns When Monitoring Recent Followers While tracking your recent Instagram followers can be insightful, it’s crucial to prioritize your privacy and security. Here’s what to consider: 1. Avoid Unreliable Third-Party Apps Many apps claim to help you track how to see most recent followers on Instagram, but not all are trustworthy. Using unreliable apps can lead to: What to Do: 2. Enable Two-Factor Authentication (2FA) Adding 2FA to your Instagram account ensures that only you can access it, even if your password is compromised. How to Enable 2FA: 3. Be Cautious When Checking Others’ Followers Understanding how to see someone’s recent followers on Instagram may raise ethical concerns. Avoid using unethical methods that violate Instagram’s guidelines or invade others’ privacy. 4. Regularly Update Your Password Changing your Instagram password periodically reduces the risk of unauthorized access. By following these best practices, you can enjoy the benefits of tracking followers without compromising your account’s safety or violating others’ privacy. Conclusion Keeping track of your recent Instagram followers offers more than just insights—it’s an
Fix ‘Tweets Aren’t Loading Right Now’ with These Easy Steps
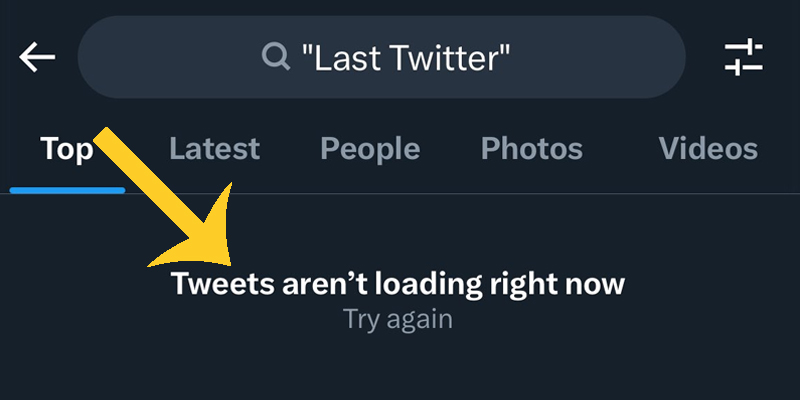
Seeing the message “tweets aren’t loading right now” pop up when you’re trying to scroll through your Twitter feed can be really frustrating. It leaves you wondering, “Why is my Twitter not loading?” or even if something more serious is going on. Whether you’re catching up on the latest news or checking your notifications, this issue can quickly put a damper on your day. The good news? Most of the time, it’s nothing too serious. Issues like a weak internet connection, an outdated app, or even Twitter’s servers having a hiccup are usually to blame. Sometimes, people even worry that “tweets aren’t loading right now means blocked,” but that’s not always the case. This guide will walk you through the common reasons why “twitter posts aren’t loading right now” and show you simple steps to fix the problem. Whether you’re using an Android or iOS device, these tips will help you get your Twitter feedback in action. Let’s get started and make sure you never miss another tweet! What Does “Tweets Aren’t Loading Right Now” Mean? The error message “tweets aren’t loading right now” is Twitter’s way of letting you know that it’s having trouble displaying content. This could happen while you’re scrolling through your timeline, checking replies, or searching for specific tweets. The issue often feels like a roadblock, leaving you stuck without any updates. But what does it really mean? Typically, this message pops up when Twitter can’t connect to its servers or when something on your device is preventing tweets from loading properly. It could be due to a weak internet connection, server downtime, or temporary glitches in the app or browser you’re using. Sometimes, people wonder if this message indicates they’ve been blocked by someone. While that’s a possibility, it’s not always the case. This error is much more likely to be caused by technical issues rather than social settings. If you’re asking, “Why is my Twitter not loading?” rest assured that there’s usually a simple explanation and an even simpler fix. In the next sections, we’ll dive deeper into why this happens and how to resolve the issue so you can get back to enjoying your Twitter feed without interruptions. Why Are “Twitter Posts Not Loading”? If you’re facing the issue where “Twitter posts aren’t loading right now,” it’s usually caused by a handful of common problems. Understanding these reasons is the first step to resolving the error and getting your Twitter feedback on track. Here are the most likely causes: 1. Poor or Unstable Internet Connection A weak or fluctuating internet connection is often the main culprit behind “tweets not loading.” Twitter relies on a steady connection to fetch and display your feed. Without it, you’ll encounter delays or errors while loading posts. 2. Twitter Server Outages Sometimes, the problem isn’t on your end. Twitter’s servers could be down due to maintenance or unexpected outages. When this happens, you’re likely to see the message “Tweets aren’t loading right now.” You can confirm this by checking tools like DownDetector. 3. Outdated Twitter App An outdated app can cause compatibility issues, leading to errors like “Twitter posts not loading.” Updates often include bug fixes and improvements that ensure smooth functioning, so skipping updates can create loading problems. 4. Accumulated Cache and Cookies Excessive cache and cookies on your browser or device can disrupt how Twitter functions. This can lead to slower performance or the dreaded “tweets aren’t loading right now” error message. 5. Browser or Device Compatibility Issues Using an outdated browser or one that’s not fully compatible with Twitter can also cause problems. Similarly, older devices with outdated operating systems may struggle to load Twitter posts properly. 6. Third-Party Apps or Restrictions Sometimes, third-party apps, firewalls, or even ad blockers can interfere with Twitter’s ability to load content. If you suspect this, temporarily disabling these tools might help resolve the issue. Now that you know why “tweets aren’t loading right now” or why your “Twitter posts not loading” issue is happening, let’s move on to the practical steps you can take to fix it. Stick around to get your feedback in action! How to Fix the “Tweets Aren’t Loading Right Now” Issue Encountering the “tweets aren’t loading right now” message can disrupt your Twitter experience, but it’s usually caused by minor issues that can be fixed easily. Below are step-by-step solutions with explanations and pro tips to help you resolve the problem effectively. 1. Update the Twitter App An outdated version of the Twitter app can cause bugs, performance issues, and errors like “twitter posts aren’t loading right now.” App updates often include fixes for these issues, so keeping your app up-to-date is essential. Pro Tip: Enable automatic updates in your device settings to ensure your Twitter app is always running the latest version. 2. Clear Browser Cache and Cookies Cached data and cookies stored in your browser can become outdated and interfere with Twitter’s functionality. Clearing them helps remove any corrupted data that might be causing the “tweets not loading” issue. For Chrome Users: 1. Open your browser and click the three-dot menu in the top-right corner. 2. Navigate to Settings > Privacy and Security > Clear Browsing Data. 3. Check the boxes for Cookies and other site data and Cached images and files. 4. Click Clear Data and restart the browser. For Safari Users: 1. Go to Settings > Safari on your device. 2. Tap Clear History and Website Data. 3. Confirm by selecting Clear History and Data. Pro Tip: If clearing cache doesn’t work, try accessing Twitter in Incognito Mode or using a private browser window to bypass stored data. Know The Best Time to Post on TikTok 3. Check Your Internet Connection A weak or unstable internet connection is one of the most common causes of the “twitter posts aren’t loading” error. Ensuring a strong and stable connection is crucial for Twitter to function properly. Steps to Verify: 1. Check if your device is connected to a Wi-Fi network or
Best Time to Post on TikTok
Timing is everything when it comes to TikTok. With over 1 billion active users worldwide, TikTok is one of the fastest-growing social media platforms, where trends go viral in hours, and timing can make or break your post’s reach. The platform’s algorithm rewards engagement, and posting at the right moment can significantly increase your chances of gaining views, likes, and followers. According to a recent study by Influencer Marketing Hub, TikTok posts that go live during peak activity hours see a 30% higher engagement rate than those posted at off-peak times. This means understanding when to post on TikTok is crucial if you want to stand out in a sea of creators and brands. Take this real-world example: A small skincare brand, GlowNaturals, noticed their posts weren’t getting much traction when uploaded at random times. After analyzing TikTok’s peak engagement periods and consistently posting at 7 PM, the brand’s views increased by 45%, and one of their videos even hit 300,000 views in 48 hours. This shift not only boosted their visibility but also brought in a significant uptick in sales. This article will guide you through the best times to post on TikTok, why they matter, and how to discover the perfect schedule for your audience. Whether you’re a content creator or a business, mastering TikTok timing can be your key to viral success. The Best Times to Post on TikTok Timing your TikTok posts strategically can mean the difference between your video getting a few likes and going viral. TikTok’s algorithm rewards content that generates quick engagement, so posting during periods of high activity is essential. While finding the perfect time might seem challenging, extensive research has revealed patterns that can act as a starting point. General Best Times to Post on TikTok According to a study by Influencer Marketing Hub, TikTok engagement peaks at specific times throughout the week. These recommended times (in Eastern Standard Time) are: Day Best Times (EST) Why These Times Work Monday 6 AM, 10 AM, 10 PM Morning routines and late-night browsing. Tuesday 2 AM, 4 AM, 9 AM Early risers and morning commutes. Wednesday 7 AM, 8 AM, 11 PM Midweek routines and late-night activity. Thursday 9 AM, 12 PM, 7 PM Lunchtimes and evening engagement. Friday 5 AM, 1 PM, 3 PM Early mornings and pre-weekend excitement. Saturday 11 AM, 7 PM, 8 PM Weekend relaxation and prime TikTok scrolling. Sunday 7 AM, 8 AM, 4 PM Morning activity and afternoon leisure. These times reflect patterns when TikTok users are actively scrolling, sharing, and engaging. For example, early mornings and late evenings are popular as people start or wind down their day, while lunchtime hours also see a surge in activity. Best Times to Post on TikTok by Day: A Breakdown Here’s a deeper look at how these times align with daily user behavior: Why Timing Matters for TikTok’s Algorithm TikTok’s algorithm evaluates engagement in the first 60 minutes of posting. Posting during peak hours ensures your video gains early likes, comments, and shares, signaling to the algorithm that it’s worthy of wider distribution. This is why understanding the best times to post on TikTok is crucial. How Time Zones Influence TikTok Posting Times If your audience spans multiple time zones, posting at the right time becomes even more critical. For instance: If you’re targeting a global audience, consider using analytics tools to understand when your followers are most active, and experiment with posting during those hours. A Real-World Example of Timing Success A fitness content creator, Alex, used to post randomly throughout the day but noticed inconsistent results. After analyzing TikTok’s recommended posting times and his audience data, he began consistently posting at 7 PM and 11 AM, which aligned with his followers’ active hours. His engagement rate increased by 35%, and his follower count grew by 20,000 in three months. This shift also led to one of his workout videos going viral, racking up over 500,000 views in less than a week. Best Times to Post on TikTok by Industry TikTok’s diverse audience spans across industries, with each niche having its unique engagement patterns. Understanding how your industry influences the best posting times can give your content a significant edge. Let’s dive into how timing can vary depending on the type of content and audience preferences. Industry Optimal Posting Times Reason Fashion & Beauty 6 PM–10 PM Evening relaxation aligns with aspirational content. Fitness & Wellness 6 AM–9 AM, 7 PM–9 PM Morning workouts and post-work routines. Food & Beverage 12 PM–2 PM, 7 PM–9 PM Meal times encourage engagement with food content. Education 7 AM–9 AM, 3 PM–5 PM Study breaks and commutes align with educational needs. Entertainment 9 PM–12 AM Late-night is prime for fun and engaging content. Tech & Gaming 6 PM–9 PM Evening relaxation and weekend activity dominate. 1. Fashion and Beauty 2. Fitness and Wellness 3. Food and Beverage 4. Education and Tutorials 5. Entertainment and Trends 6. Tech and Gaming How to Tailor Timing to Your Industry By aligning your posting schedule with your industry’s engagement trends, you can maximize your reach and create content that resonates with your audience. Read About What Does ISO Mean on Facebook? Using TikTok Analytics to Find Your Ideal Posting Time While general guidelines for the best times to post on TikTok are helpful, the most effective strategy is to tailor your posting schedule to your unique audience. TikTok’s built-in analytics tool is your best friend for this. By analyzing your audience’s behavior, you can determine exactly when they are most active and engaged. Why TikTok Analytics is Essential TikTok’s analytics provide real-time insights into your account’s performance. It helps you understand your audience’s demographics, behaviors, and active hours, allowing you to optimize your posting schedule. This ensures that your videos appear when your followers are most likely to interact with them, giving you a better chance of going viral. According to TikTok statistics, videos posted during a follower’s most active times see a 50%
How to Turn Birthday Notification on Facebook? (Simple Steps for Mobile and Web)
Forgetting your friends and close ones’ birthdays is a typical crime you should never commit. But what can you do? The human mind often forgets important things. But don’t worry—you can easily avoid committing this crime. How? Just turn on your Facebook birthday notifications! Turning on notifications on Facebook will remind you every time a friend’s birthday is coming up. So you never miss the chance to send them well wishes and keep yourself safe from committing a crime. But if you are unsure how to do it, this blog is here to help you. The blog walks through the step-by-step process of “how to turn on birthday notifications on Facebook.” Whether you’re using a desktop or your phone, this blog has covered how to turn on those notifications. Without making further ado, let’s explore. Steps to Turn on Birthday Notifications on Facebook (Mobile) Turn on birthday notifications on Facebook following the steps outlined below: Step 1: Open the Facebook application on your mobile phone and log in to your account. Step 2: After logging in, click on your profile photo at the top right corner of your mobile screen. Step 3: A drop-down will appear; choose the “Settings & Privacy” option from that drop-down. Step 4: Now from there, click on “Settings” Step 5: You will see a list of choices after clicking on the “Settings” option. Scroll down and select “Notifications” from the “Preferences” section. Step 6: Once you click “Notifications,” you will see a list of options. From the available choices, select “Birthdays.” Step 7: Now, switch to the right on “Allow notification on Facebook” to turn on notifications. Voila! You got your answer on how to turn on birthday notifications on Facebook mobile. Steps to Turn on Facebook Birthday Notifications on the Web and Desktop Here are the simple steps to turn on birthday notifications on Facebook using the web application or desktop: Step 1: Open the Facebook application or use Google to log in to your account. Step 2: Once logged in, click on your profile photo at the top left corner of your screen. A dropdown menu will appear with the following options. You need to choose the “Settings & Privacy” option. Step 3: After selecting “Settings & Privacy” from the dropdown, you’ll see a list of options. From there, click on “Settings.” Step 4: You will navigate to the “Setting & Privacy” window, which will look like this. Step 5: In the “Settings & Privacy” section, scroll down to the “Preferences” area available on the right of your screen and select the “Notifications” option. Step 6: You’ll see several options in the “Notifications” section. Scroll down and select the “Birthdays” option. Step 7: In the “Birthdays” section, toggle the right-hand switch that says, “These are notifications about your friends’ birthdays” to receive push notifications on your friends’ birthdays. Step 8 To receive push notifications via email, SMS, or Facebook Push, activate the corresponding buttons from the options provided. That’s it! You’ll never miss a friend’s birthday again. By following these steps, you can relax, knowing you’ll be reminded of your friends’ birthdays without stress or worry. Read Also Step-by-Step Guide on How to Delete Your Facebook Watch History Common Reasons Why Am I Not Getting Facebook Notifications? Not getting a Facebook birthday notification is frustrating and it becomes worse when you don’t get a notification on a best friend’s birthday. So, here are some common reasons why you might not be receiving these notifications: 1 – Notification Settings are Disabled The most common reason for not receiving birthday notifications is that your notification settings might be turned off. You must enable notifications through the settings option available on Facebook apps or the web to start getting notifications. If you need help to enable these settings, you can follow the step-by-step process outlined above. 2 – Application Permissions are Not Granted Another common reason is that permission has not been granted. On mobile devices, Facebook may not send notifications if you haven’t granted the app permission. To enable permissions, go to your device’s settings and ensure that Facebook has permission to send notifications. Application permissions are often found under your device settings’ “Apps” or “Notifications” sections. 3 – DND Mode is Activated Unfortunately, there is a chance that you may have turned on your mobile and app notifications, but you still haven’t received the birthday notification—just because your “Do not disturb” or similar mode was on. In DND mode, all notifications will be exceeded, and you will not receive any alerts from Facebook. Disable this mode to start receiving notifications again. 4 – Your Facebook App is Outdated This mistake is generally overlooked, but it is important to keep your Facebook app updated. An outdated app can cause various issues, including problems with receiving notifications. Developers frequently release updates to fix bugs and improve performance. To ensure you’re not missing any notifications, check for updates in your device’s app store and install the latest version of Facebook. This simple step can resolve many notification-related problems and ensure you get all your friends’ birthday alerts. Learn About What Does ISO Mean on Facebook? 5 – Internet Connection Issue Poor or low internet services can make it difficult to receive notifications from Facebook. It is important to check and update your internet connection regularly. If you are facing frequent internet connection issues, make sure you restart your phone or contact customer care of the network-providing company. Time To Take Action Now that you know how to get birthday notifications on Facebook, it is time to put them into practice. Follow the steps mentioned in the blog to ensure you never miss a friend’s birthday again. Importantly, turning notifications on Facebook not only reminds you about birthdays but also keeps you updated and connected to your friends, so you always prepare to send them timely wishes. Take action now and stay engaged with your friends. FAQ

Why Are My Instagram Stories Blurry? — Quick Ways to Fix
Instagram is currently one of the most popular photo-sharing social media platforms worldwide. With over 500 million users engaging with Instagram Stories daily, a blurry appearance can be quite embarrassing, right? Many have experienced this embarrassment and wondered, “Why are my Instagram Stories blurry?” Don’t worry; you’re not alone—many of us have faced this issue. Hence, in this blog, you’ll discover why your Instagram Stories might appear blurry and find some tips to fix the problem. So, let’s quickly dive in and find out the answer to the question, “Why do my instagram stories look blurry?” Reasons Why Stories Appear Blurry on Instagram Several reasons make your Instagram Stories blurry. Here are the seven possible reasons: Reason 1 — Poor Internet Connections The common reason Instagram stories are blurry is a weak or unstable internet connection. When your device struggles to receive and transmit data, the quality of the content you’re viewing or uploading can suffer. Further, slow or poor internet connectivity causes images to take longer to load or buffer than usual, which may result in blurry results and videos looking pixelated. To fix such issues: Reason 2 — Low Quality Photo If you upload a photo or video of poor quality, it will likely appear blurry on your IG Stories. Why does this happen? Instagram has specific standards for image and video quality; when your media doesn’t meet these, the platform automatically compresses it. The compressed image or video looks blurry and provides you reduced revolutionary story on Instagram. Hence, it is important to understand IG story resolution requirements: Reason 3 — Excessive Customization Adding too many elements, such as stickers, GIFs, or music, can also degrade the quality of the story. Instagram uses a compression algorithm to optimize content for fast loading. Each additional element increases the file size, prompting Instagram to compress the overall content more aggressively. Such compressed files can lead to noticeable drops in resolution, especially if the media isn’t uploaded at the recommended specifications. Reason 4 — Camera Quality If your camera settings are lower resolution, the content you capture will appear blurry when uploaded. Some phones also have options like “Data Saver” that limit media quality to conserve storage space or data usage. In such cases, using the Instagram camera can help, as it is optimized for the platform, which reduces the chances of compression further, if you are taking photos or videos from your camera, set at least 1080 x 1920 pixels to maintain clarity. Reason 5 —Your Might Not Cleared Your Cache Your phone stores temporary data for each app in a location called the cache. Over time, the cache can become too large, which may cause issues like Instagram Stories appearing blurry. For Android users, clearing Instagram’s cache is a simple process. Here’s how to do it step by step: How to Clear Instagram Cache on Android: Note: Clearing the cache won’t delete your Instagram data, like your login info or photos, but it can help resolve performance issues. Reason 6 — Instagram is Down While it may seem like a simple issue, users often overlook it. Sometimes, Instagram experiences server outages or technical issues that can affect the quality of uploads, including Stories appearing blurry. When the platform is experiencing downtime, your uploads may not process correctly, or the content might display lower quality. How to Check if Instagram is Down? Reason 7 — Device Storage Limitation Many people are unaware of this and might wonder, “Could storage limitations be causing my Instagram Story to appear blurry?” The answer is yes. When your device runs low on storage, it can affect performance, including the ability to process and upload high-quality images or videos. With limited storage, your phone may need help to handle the large file sizes required for precise, high-resolution uploads, which leads to blurry or pixelated Stories. Here is how you can fix it: So, here we end the reasons why my Instagram stories come out blurry. Let’s discuss how to fix this issue in the next section. How to Fix Blurry Instagram Stories: Ways to Fix This Problem Here are a few tips that will help you fix the issues on blurry IG Stories: Why is it Essential to Fix Blurry Instagram Stories? Fixing blurry Instagram Stories is essential for several reasons. Days are gone when Instagram was solely used to share your photos and videos. Today, Instagram is among the most popular platforms for many organizations and individuals for brand building, communication, and sales. Hence, here are a few reasons that make it essential to fix blurry Instagram Stories: First Impression is Last Impression — With 2 million active users, Instagram has become a critical space for brand building, product promotion, and community building. Instagram Stories are often one of the first things people see when they engage with your profile. A blurry Story creates a poor first impression, which makes your content appear unprofessional or low-quality. In contrast, high-quality, clear images and videos reflect better on your personal or business brand. Better User Experience — With millions of users sharing Stories daily, blurry uploads can significantly detract from the overall user experience. Poor quality can frustrate viewers, potentially leading them to disengage from your content. Smooth Delivery of the Message — The clarity of your Instagram Stories directly influences how smoothly your message is delivered. Influencers, businesses, and brands rely on Stories to communicate important updates, promotions, or personal messages. If the content is blurry, it disrupts the flow of communication and can lead to misunderstandings or missed opportunities. Maximize Engagement — High-quality visuals are more likely to capture attention and encourage interaction. Clear, vibrant Stories can increase engagement through likes, shares, and comments. This engagement is essential for building a loyal following and can significantly impact your reach and visibility on the platform. Clarity Makes the Difference Clear Instagram Stories can significantly impact your presence on the platform. Hence, in this blog, we have discussed why are my Instagram stories blurry

Step-by-Step Guide on How to Delete Your Facebook Watch History
It can be uncomfortable when Facebook tracks your videos to provide personalized recommendations. Watching the same videos that may be private and personal could make you uneasy. Especially if you share your account or your friend may take your phone for a scroll, such repetitive videos can make you feel uncomfortable. In fact, Facebook videos receive over 8 billion views every day according to adamconnell. Fortunately, an easy solution to this issue is deleting your Facebook Watch history. This blog will guide you through a step-by-step process on how to delete Facebook Watch history. So, if you’re looking for a quick and easy solution to clear your watch history and regain control over your recommendations, keep reading. How to Delete Facebook Watch History? Luckily, you have control over deleting your Facebook watch history. By following the steps outlined in the section below, you can clear your history quickly and easily. Let’s explore: Steps to Clear Facebook Watch History on Android Here’s a simple guide to clear Facebook watch history on your Android device: #Step 1 — Open the Facebook app #Step 2 – Navigate to your profile, Tap on your profile picture in the top left corner of your screen. #Step –3 Access your menu and select “Settings & Privacy.“ #Step – 4 Tap on the setting button, and you will navigate to the following drop-down menu. #Step 5 — Now from the drop-down menu scroll down and tap on “Activity Log.” #Step 6 — Tap the “Filter” button right on the top of the screen. Scroll the options and select “Videos watched” from the options. #Step 7 — Tap the “Clear All” button on the screen. #Step 8 — A confirmation prompt will appear. Tap “Clear All” again to finalize the process. That’s it! Your Facebook Watch history from Android is now cleared. Learn How to Unhide a Facebook Post? Steps to Clear Watch History on Desktop: #Step 1 — Login to your Facebook account using a desktop through the web or Facebook web app #Step 2 — Click on your profile photo on the left corner of your screen. #Step 3 — A drop-down menu will appear when you click on your profile photo. Select the “Settings & Privacy” option from the drop-down menu. # Step 4 — When you click on “Settings & Privacy,” a drop-down menu will appear. From there, simply select “Activity Log.” #Step 5 — After selecting the “Activity Log” option you will see the following option to choose. Click on the “videos you’ve watched” option. # Step 6 — Now click on “clear watch history” on the top of the left side of your screen. # Step 7 — On clicking “clear video watch history,” you will be prompted with the option: If you want to clear the history, click “clear video watch history.” And it’s done. Following these steps will clear Facebook watch history using the browser. Now, let us learn how to delete your Facebook watch history on Android. How to Clear Your Live Video History on the Web? Clearing live video history differs from deleting regular short videos or other shared videos you watch on Facebook. Here is the step-by-step process to clear live video history on the web from Facebook: Note: The first few steps to delete live videos are common as mentioned earlier for deleting watch videos from the web. However, to streamline the process, we’ve outlined those steps again for your convenience. #Step 1 — Login to your Facebook account using a desktop through the web or Facebook web app #Step 2 — Click on your profile photo on the left corner of your screen. #Step 3 — A drop-down menu will appear when you click on your profile photo. Select the “Settings & Privacy” option from the drop-down menu. # Step 4 — From there, simply select “Activity Log.” #Step 5 — After selecting the “Activity Log” option you will see the following option on the right side of your screen. # Step 6 — Select “live video you’ve watched”. # Step 7 — Now click “clear watch history” on the top of the left side of your screen. #Step 8 — A confirmation prompt will appear. Tap “Clear All” again to finalize the process. Voila, the live video history will be permanently removed from your profile. Read About What Does ISO Mean on Facebook? Why You Should Delete Your Facebook Watch History? There are many benefits to clearing Facebook watch history, such as protecting your privacy and making sure your Facebook space remains organized. Apart from that, clearing your watch history can benefit you in specific ways: 1) Protects Your Privacy: Facebook continuously collects data from your activity, including the videos you watch. Over time, this history builds up and gives Facebook more insight into your preferences, interests, and habits. Deleting your watch history can reduce the personal information Facebook has about you and protect your privacy. Further, it also limits Facebook from using data to build personalized ads and content recommendations. 2) Avoids Embarrassing Situations: If you share your account or if friends or family occasionally use your phone, having your watch history visible could lead to awkward moments. Specific videos, especially those that are private or sensitive, might pop up unexpectedly. Such an expected pop-up creates an embarrassing situation for you. Hence, clearing your watch history before it leads to uncomfortable moments is wise. By vanishing watched videos regularly, it makes sure your content stays private. 3) Refreshes Your Recommendation: Every time you delete your watch history, it clears up your past activity. Significantly, it also refreshes Facebook algorithms for video recommendations. This gives the platform a clean slate, allowing Facebook to suggest new content based on your interests rather than outdated preferences. 4) Controls Your Digital Footprints: Each interaction you make online leaves a digital footprint, and your Facebook Watch history is a part of that. In a world where data security is increasingly important, controlling your online activity is crucial.